Saturday, November 28, 2009

Gridlocked!

There's no place to work in our basement, because all the workplaces are covered with stuff. It's getting close to being project gridlocked - or, more euphoniously, craplocked.

I have an 1899 newspaper I pulled out of a wall and don't know what to do with (it's covered with black dust and presumably worthless), half-stripped french doors that we may or may not build into the living room arch, several family "heirloom" furniture pieces to be rebuilt, 78 rpm records, Aztec radiant heaters to sell, a rusty pot-belly stove, cabinet parts for the living room, several generations worth of heavy iron tools in a variety of wooden tool chests, and more ...

That's not even counting current projects.

The work tables are covered, the shelves are full. There's no more room! Stop me before I bring home more crap!

Sunday, February 01, 2009

In Buffalo the snow is piling up

In Buffalo, January 2009 was the 16th coldest January in 139 years of measurements, with an average temperature of 18.5º F, a full six degrees colder than normal. We had just over 30" of snow in the month, and it has not been melting. Fortunately the 49" we got in December mostly melted before the new year, but we are running out of room at our place for the cleared snow. It warmed up a little the first day of February: 39º.


Saturday, January 27, 2007

My summer garage roof project

Last summer I replaced the structure and roof on my hip-roof garage, originally constructed in 1940. Like most projects here, it started as a modest project, just new plywood and roofing. I soon realized that the structure was gone, rotted, and needed complete replacement down to and including the wall top-plates.

Here's the new roof:

Click for gallery

Click the image to see more pictures.

My son and I did all the work ourselves, with help from my wife and neighbor to raise the first two hip rafters. We started tear-off on July 1, 2006. I took some days off work, but mostly worked weekends, and finished about September 16, 2006.

(photos refreshed 9/16/14)

Labels: , ,

Wednesday, March 15, 2006

Fireplace Redux

Here is the mantle to my fireplace. The PO kept the upper part in the attic. They did a lot of crazy things to the house, but I will thank them forever for keeping this piece in the house.


(photos refreshed 9/8/14)


Thursday, January 19, 2006

Soapstone Sink Drains

Here is what the new drains look like on my refurbished 2-basin soapstone sink.

I had a problem with replacing the drains on the sink last year. The standard hardware is made for thin basins, but the stone is 1-1/8" thick. I found a good solution at a plumbing supply house.

They make extended drains, as shown in the photos below. A bonus with these drains is a nice deep strainer basket that serves as a stopper when the wire loop handle is flipped the right way.

Because the old drain was a smaller diameter than the new one, I had to router out a larger inset. It was tough on the router bit, but it worked. I then set the drain in a bead of silicone sealant before tightening the nut underneath. It came with a thin fiber washer, which goes right above the nut.


(photos refreshed 9/8/14)


Tuesday, December 06, 2005

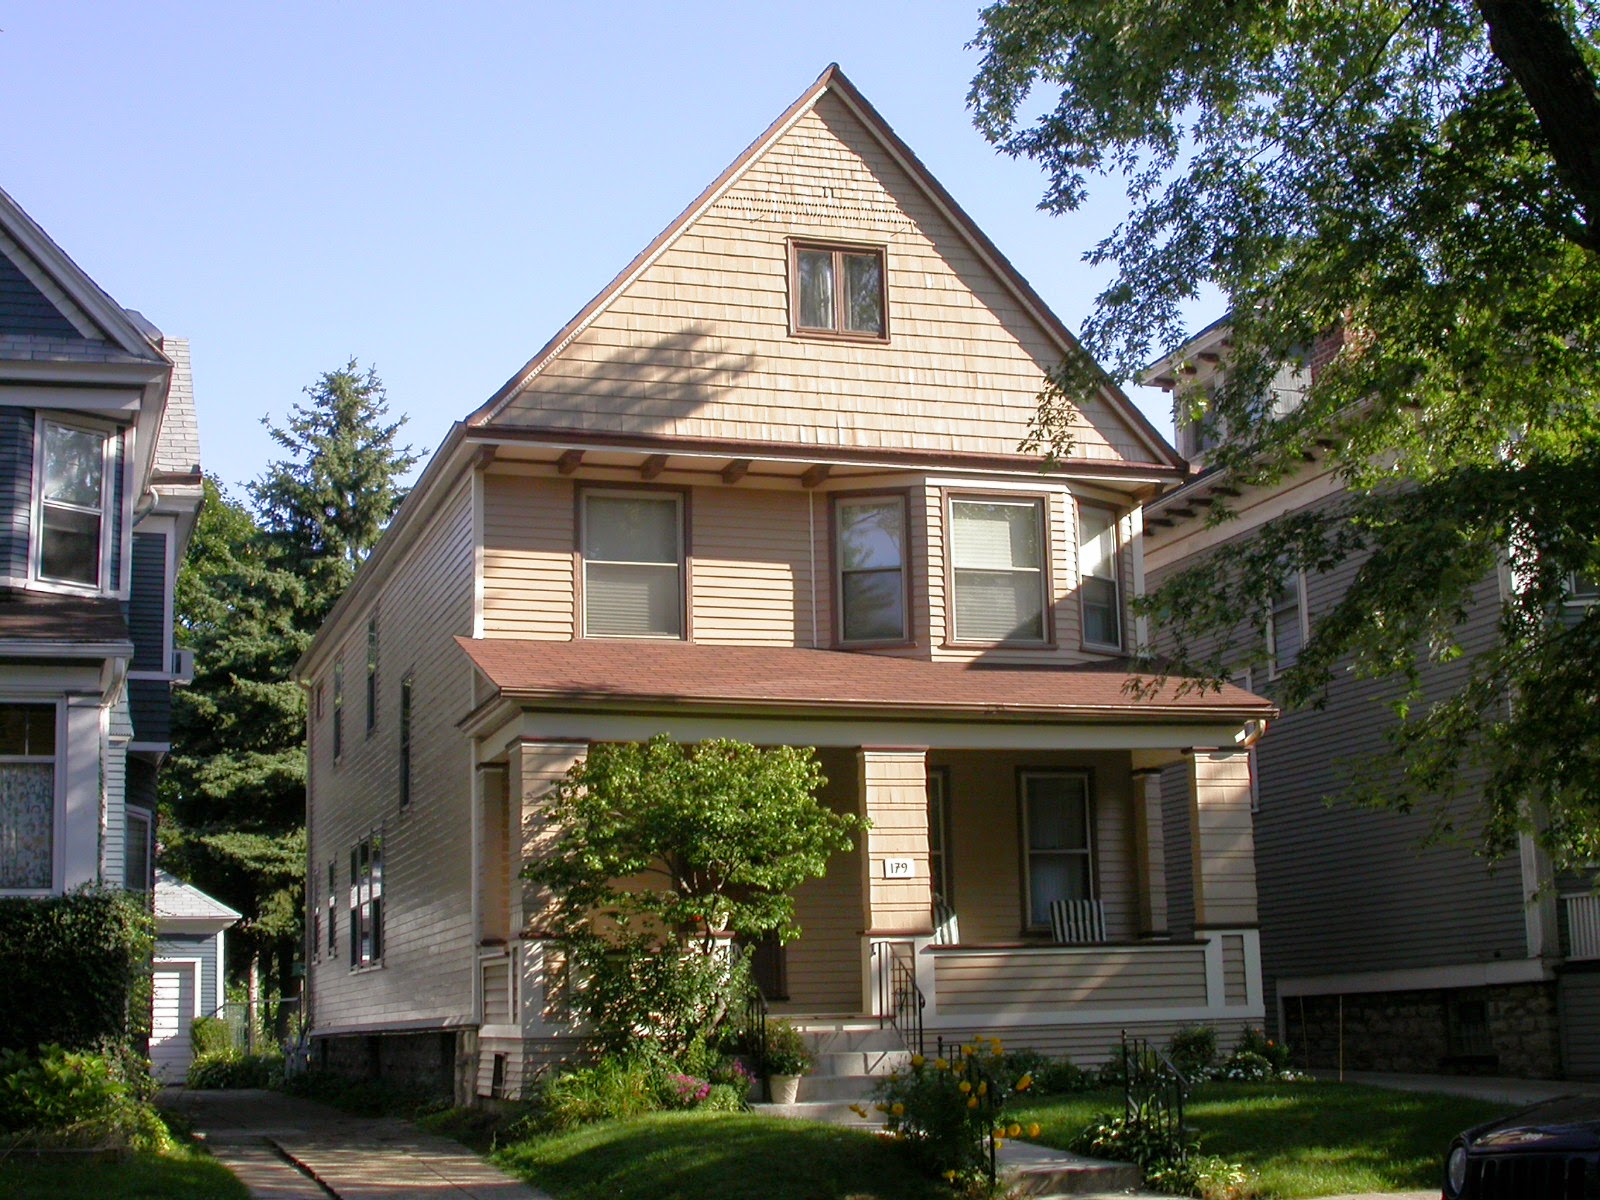
179 Cleveland Avenue


Located in Buffalo, NY, the house was built in 1912. The porch roof was originally flat, as I discovered when I re-roofed a few years ago. The decorative elements below the porch railing are definitely not original, I designed them when I rebuilt the lower half of the porch. The attic window is a 1960's replacement. I suspect the main roof is original.


(photos refreshed 9/8/14)

Thursday, December 01, 2005

My Fireplace

This is my fireplace insert. I'm trying to figure out if it's designed for wood or coal. I was able to find the patent for the back lining, but Googling "The Buckeye" name proved fruitless.

The opening is 20" wide by about 29" high at the front.


I found the patent by searching by date at the U.S. Patent Office. Because the patent was dated before 1976, it was necessary to search each document image. I first narrowed down the date range, and then looked at every July 19, 1892 patent until I found the one I was looking for. Patents are issued on Tuesdays, and there were about 127 patents ahead of this one.

(photos refreshed 9/8/14)

Sunday, January 23, 2005

Refurbishing a Soapstone Sink

I had a three-basin soapstone sink in my 1912 basement, on a rusted-out stand. When I refurbished my laundry room, I puzzled long about what to do with with the sink. I hated the idea of replacing it with plastic, and it weighed 500 pounds (I borrowed a sling scale from work) so I did not relish the idea of hauling it out.


Ultimately I decided to rehabilitate it. The soapstone can be worked almost like wood, if you are willing to sacrifice some tool bits.


I cut off the old metal drains and removed all the remaining strainers. One of the basins was beyond repair, so I used a masonry blade in my circular saw to cut off one basin. I replaced the rusted tension rods underneath with stainless steel to hold the front panel to the back panel.

There was a broken-through spot on one of the remaining basin side walls, but gray plumber's epoxy is an acceptable color match. I cleaned the wound with a wire brush and alcohol, and filled it with epoxy, smoothing it before it set.

I scraped any spalling stone and sanded the surface, which did not really have as much beneficial effect as I hoped.

The big box home center did not have a deep enough drain, but one of the plumbing supply houses had one that would fit the 1-1/8" thick stone. I had to router the stone a little to get the flange to fit below the surface of the stone. I used the rubber gasket that came with the drain, but set it in grey silicone caulk.

Lastly, I built a simple flat-frame pressure-treated 2x4 stand, with diagonal bracing glued and screwed with polyurethane glue and 3" and 4" screws. I laid a 2x4 flat at the front and the back to support the front and back stone panels. By levelling the stand, this gave the sink a slight slope to the back for good drainage.

So it is indeed possible to rehabilitate these sinks, if you're crazy enough to try.

(photos refreshed 9/8/14)